Monday, July 15, 2013

Froggy!

This adorable frog was made by my friend, Amy.  She followed Heidi Bears' pattern, Tomato the Frog Prince (available on Ravelry).  I can't wait to make my own Heidi Bears' projects!  I see a Hippo and a Frog in my future!  Amy used mainly yarns from her awesome Phat Fiber Sampler group.  She not only receives the boxes, she is a contributor too.  This looks like such a fun site for all fiber enthusiasts!


Phat Fiber says,
"With a focus on the independant artisan, this box is a super grass-roots treat for the senses. When your box arrives, chock full of samples, expect to be overwhelmed with the sight and feel of artful yarns, bits of roving, small batts, stitch markers, original patterns, valuable discount coupons and much much more."

Amy says that the motifs for the frog went very quickly and they were super addictive.  Thanks to Amy for adding even MORE things to my list of projects-to-do!

Saturday, May 4, 2013

May Classes at Yarndogs

Here are the classes I am teaching at Yarndogs this month!  You must contact Yarndogs to sign up and pay for your class.  408-399-1909  or email them through http://www.yarndogs.com/
Class costs vary.


Sunday, May 5, from 12-1pm: Spiderweb Scarf:  
This is my own design!  It is both charted and written and can be purchased on Ravelry.com for $3.25.  The scarf is made from 2 skeins of Koigu sock yarn, then blocked to open up the gorgeous spider web design.   You should know how to chain, sc, and dc.  I will teach you the quad-treble crochet!


Tuesday, May 7,  from 10-11am:  Granny Squares:  Beginners!  Learn to make the basic granny square from a chart and written instructions.


Spiderweb scarf, my design
Saturday, May 11, from 10am-12pm:  Shibui Mix Shawl (knit)
A soft dreamy triangular shawl made with Shibui Staccato and Silk Cloud yarn.  Shibui plays with texture in this monochromatic design.  Should know how to knit, purl and yarn over.

Saturday, May 11,  from 1-2pm:  Crochet Techniques:  Learn a variety of methods for joining granny squares and other motifs.  Invisible and decorative joins are both taught, as well as recommendations for when to use each type.  HOMEWORK For the Crochet Techniques class, the student will need to bring 2 completed granny squares, a tapestry needle, contrasting yarn to completed squares, and crochet hook to match yarn.  You will have to  make the granny squares on your own, and should be an experienced beginner.

Saturday, May 18, from 3-4pm:  Crochet Techniques:  A repeat of the above class, just in case you can't make it on the 11th!

Tuesdays, May 14, 21, and 28 from 10-11am:  Crochet with Kim: These are free sessions!  Please come and hang out with me!  We will chat and crochet!  Bring your coffee, and any projects you are working on.  If you need some tips or help with your project, I'll be on hand to help.
Shibui Mix Shawl, knit

Wednesday, February 27, 2013

Cherry Blossom Stroller Blanket


I've got a new pattern to share!  It's the Cherry Blossom Stroller Blanket, and it's just in time for spring. I will be teaching a class on this blanket at Yarndogs in Los Gatos, at the end of March.  You can buy the pattern off of Ravelry:  HERE


Sunday, February 10, 2013

Full Disclosure

An image from my latest photoshoot at Yarndogs.
I've just been commissioned to make a sweater for an LYS as a store sample.  It's not crocheted.  It's knitted.  Yes, I can knit and I enjoy knitting.  I realize that my "Modern Crochet Goddess" blog title may imply that I'm all-crochet, all-the-time, but that is not the case.  I learned to knit about 3 years ago, and until then, I just couldn't get it.  Knitting was so hard!  and so SCARY!  All those loose loops just waiting to spring free from the needles.  Ugh.  But I love the look of knitted fabric for many things, and trying to make crochet look like knitting is like ....trying to make knitting look like crochet.  So I tried again.  I took an actual class.  Thank goodness my teacher (thank you Candice!) had the suggestion of knitting continental or I would still be struggling along.  I'm still afraid of all those loops.  Still can't fix every mistake, but I really enjoy knitting and learning another craft has expanded my crochet knowledge.

Friday, February 8, 2013

Modifying Crochet Hooks


vintage steel hook, size 4
Sparked by a thread on Ravelry, in the Crochet Liberation Front group, I had an idea which prompted a  little shopping trip to the hardware store.  The group was talking about shapes of hooks, how you hold your hook, how much shaft there should be before the handle tapers, whether or not you want a larger handle, etc.  So many variables!  The original question was raised by Jimbo who is a super-crochet-hook-designer.  I mentioned that I like a particular vintage steel hook that has a flat head and is a little pointy.  I thought I would try to sand down one of my Boye aluminum hooks and see if I could get a more "Kim-friendly" hook.  I really like the Boyes, but I've also been using them practically my whole life so who knows if I'm just more adapted to them or if they really do fit my hand the best.

So, I was off to the hardware store!  I bought 0000 steel wool, a multi-pack of metal sanding paper and an 8 inch metal file with double and single cut sides to it.

I worked outside, and kept Jimbo's tips in mind.  (see Rav thread: post 28)  Using the file, I started sanding off the sides of a J hook, to get the flatter, more pointy shape of that vintage hook.  I also filed the back and the front of the head.  Not the top very much though.  After I got the shape I wanted, I used the fine grit paper to smooth everything.  I used the medium on a couple of spots where the file made some deep ridges, then went back to the fine.  Once I couldn't see any more file-ridges, I polished with the 0000 steel wool.  I tried out my "new" hook on some yarn and I honestly think I was faster!

Back, side, and front view of original J Boye hook (on left) and modified J Boye hook (on right)

I'm a knife holder, and I roll my hook as I work, using the pad of my middle finger on the thumb rest, but also using my pinky (which I did not realize until today).  I made a pinky-rest on the lower part of the handle of the hook below the thumb rest.  You can see the silver part where I filed the handle, on the right side of the picture below.  This little pinky-rest seemed to make a difference too.


Full view of modified hook

This was such a fun experiment and now I think I'll have to file down all my hooks!  I really want to try it on the steel hooks I use for Irish Crochet because that flat pointy head is awesome for working the thread!

Tuesday, November 27, 2012

Piecrust Scarf Pattern!!

I've published the Piecrust Scarf Pattern!  This is a textured scarf which is worked on the long side.  The ruffle runs along one edge and it was this ruffle that sparked the name.  When I was blocking the ruffle, I felt like I was making the fluted edge of a pie crust.   The scarf was inspired by the knit "Just Enough Ruffles" scarf from Laura Chau.  I loved the shape and thought a crocheted version was "necessary" haha!  I added the awesome texture to the body of the scarf, which will prompt folks to ask you, "are you sure that is crocheted?"

I teach this scarf (by arrangement) at Yarndogs, in Los Gatos.  You can get the pattern on Ravelry HERE, or by emailing me directly.

Thursday, September 6, 2012

Golden Sweater--Third Time's a Charm!

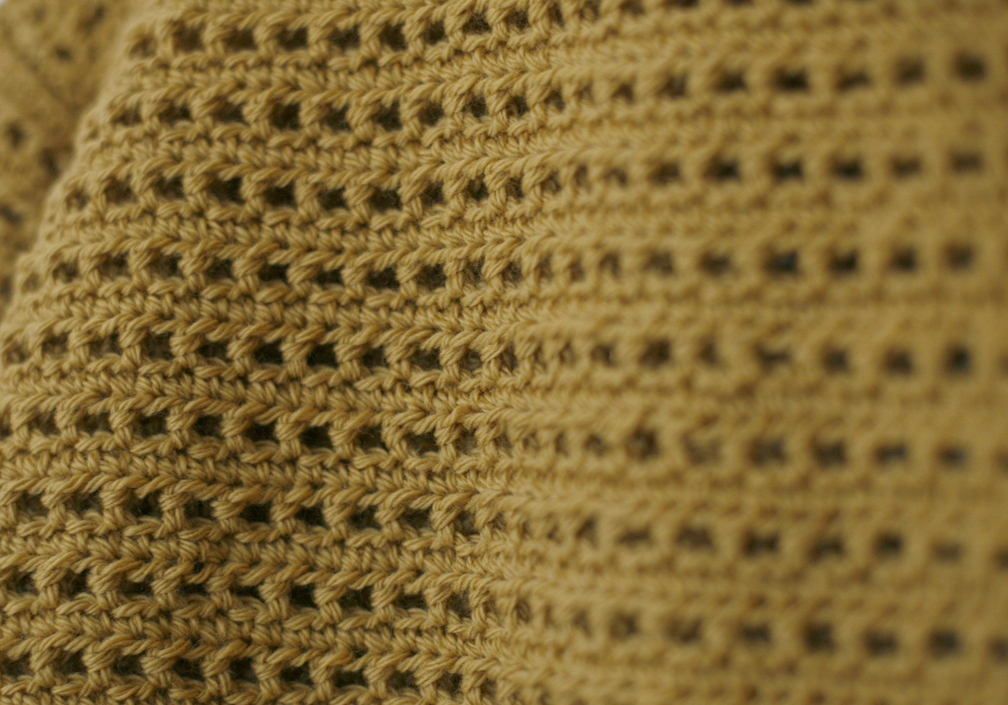
Whew!  I finally have a sweater out of the Rowan Purelife Organic Wool I bought over two years ago!  I found 10 skeins on sale at Yarndogs in Los Gatos, in a pretty camel color--Alder Buckthorn, and I bought it with a pattern in mind.   This is the third attempt at making a sweater out of this yarn.  Nothing wrong with the yarn (a little separation of the strands but I still like it!), everything wrong with ME!

Concur by Berroco
My first attempt was this cute cardi, Concur by Berroco.  I even had some big vintage turquoise buttons which looked awesome with the camel yarn.  I was using a gold Manos del Uruguay Silk Blend for the cuffs and bottom hem.  I ran into trouble during the picking-up-stitches stage....I was an inexperienced knitter and did it incorrectly.  Too many stitches picked up.  Then I got lost at the button band.  So I put it away in a bag and found it again last year.

I frogged the whole thing and used most of the gold Manos for a crocheted version of the Just Enough Ruffles scarf, which turned out beautifully if I do say so myself.


I started making Irish Coffee by Thea Colman.  SO CUTE!  But, I got only so far into it, and realized my gauge wasn't right.   And, I wasn't loving the Purelife with this pattern.  (The pattern, by the way, is fabulous!)  So I'll choose a better yarn in the future--perhaps some MadTosh.  I frogged the Purelife again.


So here we are, two years later (at least), from the original purchase date.  I learned a new crochet stitch at the beginning of the summer and I love it!  It's a crossed half double crochet, and you cross it by making a second stitch around the post of the previous stitch of the same row.  Super cool!  I tried a swatch with the Purelife and it was gorgeous.

Crossed half-double crochet alternating with a row of single crochet (US)

So I made up my own pattern, using a basic drop-shoulder construction.  I did taper the sleeves, and I added that same gold Manos for some trim.  I love the result!   It's really soft and squishy, and I just love the color.  You may not see me in the sweater anytime soon, it's a little tight.  Sad, sad, sad.  It looks great on my sister-in-law, though!  We made a deal that if I didn't wear it by Christmas, it would be hers.  Read: if I don't start losing some weight, it's hers.  There's motivation for you!


Neckline detail (right) and hem detail (left)

Tuesday, August 28, 2012

Embellished Espadrilles

What to do with all those Irish Crochet motifs???  I had a little chat with some of the ladies on the Irish Crochet Lovers forum about the motifs we make on the CAL's.  Some of them have a sample book that they keep all the motifs in.  Melba is arranging hers on a thrift-store purse.  It looks great!  She's using all different shades of brown, and all different motifs.  I've been saving mine in a little ziplock, unsure of how to use them.  The ladies got me thinking, and I decided to sew some onto a pair of espadrilles and I love the result!


Friday, July 27, 2012

Irish Crochet Together Blog Challenge Project

detail of Valentino fabric
Over at irishcrochettogether.blogspot.com we had a little challenge and this one was based on the gorgeous Valentino dress that Cameron Diaz modeled on the cover of InStyle magazine.  I learned quite a bit but I don't think I love the final product.


I love my main motif.  I made this with Blue Heron Yarns 100 percent Egyptian cotton.  I love LOVE this "yarn".  It's a 2-ply lace weight that is comparable to an eight or maybe a three-weight cotton thread.  It's shiny and soft and the color transitions are gorgeous.  It was liberating to crochet this.  I used the leaf shapes from the Valentino fabric as inspiration here.  This was free-form and FUN-- quite a change from deciphering all the antique IC patterns I had been working on.


For my background, I wanted a filled rectangle, but I wasn't sure how to do it.  First, I basted the motif to a base fabric.  I knew I was going to use the Habu Textiles Silk thread that I bought in SF for the background, and I knew I wanted to include some Clones Knots.  I started filling in the round part at the bottom of the motif with Clones Knots.  After I did that I thought it looked distracting, so I opted for surrounding the motif with a border of Clones Knots instead, and filled the round part with plain, diamond-shaped filling stitches.


I liked the four-spoked cross pattern in the inspiration fabric, so I used a shamrock type filling stitch to mimic that.  I first made the outer edge, which is the Egyptian cotton over PC (single crochet with picots).  I pinned it out to the size I wanted around the motif.

I started the shamrock filling at the bottom, went up the right side, then started again over to the left (and ripped out and re-made what you see here).  I then filled in the last rows on the top.  I learned that this silk pulls apart easily and does not rip out easily.  I haven't practiced filling stitches very often and I really need to continue to work on them!


challenge piece detail


finished challenge piece

The final piece is about 6 x 10 inches.  New techniques for me were: free-form crochet, shamrock filling stitch, and working into a corded edging.

I learned that half-double crochet doesn't look very good in IC motifs.  It makes a raised bar that I love in other projects, but the texture doesn't add much where I used it this time.

TIP:  I used my laptop portable desk by Belkin as my work surface while doing the filling stitches.  It is slanted a bit, and made of a fabric covered foam on a rigid backing.  I could pin right into it and the slant facilitated working the stitches!

Tuesday, July 17, 2012

Pillows for the Kids

We moved last month and I think we are finally at the point where I can start crocheting and blogging again without feeling guilty about ALL THOSE BOXES!  After the June WIP-up, I realized I did not have any easy, meditative projects going, so I pulled out the acrylic and made the kids some pillows to match their yarn blankies.  They went really quickly, and the kids had fun "helping" me decide on color choice and placement.

front of pillows with their respective yarn blankies
For Miss E's pillow, I made a motif which combined an Irish Rose with a circle in a square pattern, then I joined them together with contrasting yarn.  I'm thinking this might be a good pattern to post on Ravelry...add that one to my list!  For Mister M's pillow, I did the basic granny square and continued around and around.

back of pillows
For the back of Miss E's pillow, I just half-double crocheted stripes.  For the edging, I single crocheted both sides together then did a shell stitch.  The back of Mister M's pillow is the Vintage Vertical Stripe pattern.  Then I just did a plain join around in black.

Saturday, June 2, 2012

June WIP-up

I'll be writing a monthly works-in-progress post, so I can FINISH things!!!  After I gathered my projects yesterday, I realized that I'm not working on anything fun and easy.  No meditative crocheting!  I'll have to find a project for that.  Here's what I'm working on.  

Clockwise from top left:  Irish Crochet top in large thread;  scarves to write patterns for; Irish Crochet Together Blog Challenge; Miss E's top...must remake bodice; striped top....must replace bottom beginning chain...too tight and doesn't lay right.


UPDATE (July 17, 2012):  I did fix the stripe top, and will be posting a tutorial for replacing a beginning chain.  I also finished my blog challenge piece!  The others....no progress.

Thursday, May 17, 2012

Birthday Blankie

Birthday Blankie
I made this last year for Miss E, just in time for her birthday.  It didn't start out as a birthday blankie, but I rushed to finish it in time for her 6th.  With lots of encouragement from her.  "Are you working on my blankie?"  "Mommy, why don't you work on my yarn blankie?"  "Here Mommy, here's your crocheting."

Miss E's bedroom fabrics
I used Lucy's Neat Ripple Pattern and Stylecraft Special DK acrylic yarn.  I love this yarn for blankies!  It's lighter weight than our standard US acrylics from the big box stores, and the price is right.  The color selection is amazing, but sometimes all colors are not in stock.  I ordered my Stylecraft from Deramores in the UK.  At the time, there was a Rav coupon and free shipping to the US.  It was so exciting to receive the packages in the mail.  The kids pulled out all the skeins and started making "yarn trains" through the house.

My color inspiration was Miss E's coverlet and valance that I had sewed up a couple of years ago.  Of course, she wanted PINK, but I managed to talk her into adding some turquoise and green.  I'm pretty sure we ordered one of each pink shade that was available!  Then to temper all that pink-ness and bright turquoise-y-ness, I chose a yellow and a camel just in case.  It was difficult choosing colors online.  I like to lay things out and move them around when I decide on colors.   Once the yarn arrived, I was able to play with it, and lay out different color sequences.  I originally wanted to use a random sequence...well, something that looked random (but of course, is not, because I can't do random).  Miss E wanted a rainbow though, and since it was her blankie, a rainbow we have.


Miss E's Rainbow sequence                        Random (not really) sequence                            Light-Dark sequence
As you can see, color placement really affects the final look of the blanket.  I recommend laying out your skeins in different ways to see what sequence you prefer.  I've been known to sit in the aisle at the yarn store and make pretty rows while contemplating my color choices.  Doing a sketch with colored pencils is another way to visualize your color sequence.  It doesn't have to be a real drawing, just coloring thick stripes on your paper will help you to see.  Another method would be to cut out colored strips of paper and rearrange them.  Take a picture with your phone of sequences that you like so that you can recreate them.  (This works when you are arranging skeins too!)  Don't be afraid of color, have fun with it!!!

Love these together!

Sunday, May 13, 2012

Happy Mother's Day!

 
I woke up to little voices saying "Happy Mother's Day!"  Miss E (almost 7) and Mr. M (5) then went out and admonished me to stay put.  Soon they came back in, Miss E carrying a tray with a blueberry Eggo waffle, all toasted and buttered, and a bowl of coffee ice cream with a chocolate egg in it.  Breakfast in bed!  Mr. M had made me a card that said "Mommy, I love you" with all sorts of happy face pictures around it.  What a great start to my day!

My mom and her husband then came over for brunch, and she and I cooked together, making "scrambied" eggs,  bacon (the maple kind), pancakes, berries and "Promosas" (prosecco and oj).  We had a pretty table, yummy food, and very nice company.  But wait, there's more!

So. I have the best husband in the world (aka TBHITW), and he said for Mother's Day my gift was CASH to go shopping at Nordstrom!  Hooray!  I am sadly in need of some new clothes.  Then we decided I would go shopping ALONE (hooray again!) and that I could also have some CASH to go to Imagiknit in San Francisco.  ALONE!  See ya, family!  I love them, but really, mommy needs her alone time.

At Nordy's I didn't find much.  Murphy's Law, when you have money to spend, they don't have your size.  So the sandals I had been eyeing online were not available but I found a cute pair of gold t-straps.  Also found a cute pair of dark purple linen shorts.  They are pretty short but they are really cute!  Did I say they were cute?  (They are)  I ended up getting some tanks and tees at Target with the rest of my CASH.

Ok, now for the good part.  I drove up to the city, singing loudly the whole way (remember:  ALONE!).  Imagiknit is in the Castro, but a few blocks off the busy area.  Parking is a little challenging, but I got lucky and found a spot nearby.  The store is on the corner of Sanchez and 18th and it looks pretty small from the outside, but wow, when you get in there, look out!  There are two rooms, with very high ceilings, and very high shelves, packed full of yarn.  Luckily I'm super tall so I could reach all the yarn, but I don't know what you would do if you were a shortie.  The store is organized by weight of yarn and also by type of fiber.  The first room has the cash register (needles and hooks behind the counter), and has animal yarn and fiber.  They must have every color of MadTosh ever made.  There are many luxury yarns and also staples like Cascade 220.  I saw quite a few local yarns, some others that I had only seen online, and many that I had never heard of.  The second room has plant-based and man-made yarn, and a large selection of books.  They have a good sale section too; it looked like most things were 25 percent off and there was quite a bit to choose from.

I had heard some negative feedback on their customer service, so I was prepared to be snubbed, but the people there were quite pleasant, yay!  The owner was there and she was friendly and helpful to everyone who came in.  They didn't greet me immediately but I don't mind that.  Three people were working and each one at some point did ask me if I needed help finding anything.   When I told one person that I hadn't been to the store before, he excitedly pointed out some Malabrigio that was exclusive to the store.  I wandered back and forth between the two rooms and finally chose a few items.  I tried to select yarns that I couldn't get here at my nearby LYS.  They don't wind your yarn for you, but there is a swift and ball winder that customers can use.  They set up my yarn for me on the swift and I wound up my 1,000 yards of Egyptian cotton.

The first room:  animal fibers.  This is part of one wall.  There is probably three times more yarn on the other walls.
The second room:  plant-based and man-made fibers.  The wall to the right is just as full!

My haul today was pretty modest but of excellent quality and was under budget too!  On the left is a small cone of 100 percent silk from Habu Textiles.  The large ball is my 1,000 yards of Egyptian cotton from Blue Heron Yarns. It's hand-dyed shades of light greens and blues.  I'll be using the two of these together on my Irish Crochet Together Challenge.  The two small skeins were on sale, and are Twisted Sisters Petite Voodoo Special Limited Edition 50-50 Merino and Silk.  This yarn is so incredibly soft!  I was thinking maybe a lacy long cowl or something...

This happy mommy came home in time for dinner.  I hope you had a great day too!

Friday, May 11, 2012

I'm so inspired!

So much so, that I've issued a challenge on irishcrochettogether!

Maybe you haven't visited over there, but I also edit the irishcrochettogether blog and you should go check it out.

I buy InStyle now and then...not like before (children) when I had a subscription, but every once in a while I'll get a copy.  I couldn't resist this cover!  That lace dress by Valentino is so pretty!  And of course inspired CROCHET IDEAS!!!  No, I won't be making an entire blue crocheted dress, but I would like to make a little something, even just a motif, using Irish Crochet techniques.

Sunday, May 6, 2012

Teaching at Yarndogs

You may have seen this post, where I talk about my "Red Skies at Night" version of Linda Permann's Starry Night Cardigan.  I received permission from Linda to teach a class in making her pattern (student's bought their own copy of the pattern).  I loved the construction of the cardigan and the clear instructive way it was written, and thought it would be a great crocheted garment class for a medium-level student.  Also, you may remember, I LOVE LOVE how mine came out!!!  Gotta share that love!

Yarndogs in Los Gatos put me on the class schedule for last month, for my Appreciation Cowl (more on that later) and for the Starry Night Cardigan.  I have one student for the cardi, a wonderful chatty lady named Gracie, who is cheerful and sweet and makes my classes a joy.  Gracie is the student that has more knowledge than she thinks she does, and just needs a teeny bit more confidence in her crochet abilities before she is off and running on her own.  (Gracie, you can do it!!)  This is her first garment, and she is making it for her daughter.  Her daughter chose Madeline Tosh sock DK, and tried on my sample cardi for fit.  The sample fit her perfectly!  So we just followed my notes for adjustments to the pattern for length and gauge.  The motifs are now finished and Gracie is zipping along on the skirt portion of the cardi.  It won't be long before her daughter can wear this cardigan with pride!

Gracie and her own Starry Night Cardigan in progress (iPhone pix)

My other class, the Appreciation Cowl, was a hit!  I had 5 students!  It was really fun.  I had a repeat student that I hadn't seen for 6 months or so, and it was great to catch up with her.  The students were all happy to learn the foundation single crochet and said they would all use it in future projects.  It is such a useful technique!  Two of the students decide to use a bamboo-cotton blend yarn for their cowls, so they would have a more summery accessory.  We went with a G hook and a thinner DK-ish yarn, for a more open look.  I'm excited to make one like that myself!  This class was only for one hour, and we all realized another hour was wanted.   They may put the Cowl on the June class schedule again.

Wednesday, April 25, 2012

Modern Vintage--Kansas Sun Afghan

I love vintage patterns!  I have a whole shelf of them.  I received my grandma's pattern books and have purchased some here and there over the years, and I love to look through them for inspiration (or for what NOT to do :).   Sometimes I take the general shape as inspiration, and sometimes it's just the stitch, or sometimes, like today's example, I use the pattern as is, but change up the color and color pattern to make a more current version.

The afghan to the right was made by me for my Kansas grandma.  Her bedroom was yellow, so that determined my color choice.  I made this about 20 years ago, and received it back after she passed away.   I think she was afraid to use it!  I know it was folded on a chair in her room from the time she received it, but when I got it back it still looked brand new.   Now it lives on my living room couch, where we snuggle under it all the time.


Here is the original pattern book.  That lovely striped creation on the right side is the same afghan as the Kansas Sun afghan pictured above.  Even back when I made mine, the original example was dated looking, and not appealing color-wise.  I decided to use color-blocking instead of making thin stripes, and I omitted the fringe.  I didn't want it to look so busy.


If I were to make this again, I might like this pattern in the thinner stripes, but in a fresh color combo.

Check out the swatches below.  Try gray, white and pale turquoise....mmmm, beachy!  How about orange, pale blue, tan and cream? (baby boy gift...oooh or my family room needs a refresh!)  Or use Lucy colors!  This pattern is perfect for a Lucy blanket.  As a matter of fact, I've been wanting to make a cushion, Lucy-style.  This stitch pattern with Lucy colors!  ....runs off to pull yarn out of boxes....


You can get the original Vintage Pattern Here.
Link to my Ravelry Project.

Tuesday, April 17, 2012

WooHoo! Check me Out!

I met Maire Treanor last summer while taking her Clones Lace workshop in Berkeley at Lacis.  She is a wonderful woman, and is writing a series of articles for Interweave Crochet magazine on Irish Crochet lace.  She asked if she could use one of my photos for her article that appears in the Spring issue.  OF COURSE SHE COULD!

We had taken a field trip to the Sunnyvale lace museum and there was a piece of actual Clones lace there, made in Ireland.  All of their other "Irish Crochet" is from the US.  Maire could tell the difference between the Irish and the non-Irish, from the thread used to make the lace.  US lace is made with mercerized cotton and antique Irish Crochet from Ireland is made from non-mercerized cotton or linen.  I had photographed many of the lace pieces with motifs that were interesting to me, and she remembered that I had an image of the Clones piece.

Monday, April 16, 2012

Missoni Style

I love the crazy color combos and the fun patterns of Missoni.  I was determined that I could achieve the Missoni effect with crochet.  My plan was to do this with a self-striping yarn, and then I wouldn't have a bunch of ends to weave in.


My friend at Alcidina Art Yarns made me some custom dyed yarn!  She surprised me with these self-striping skeins.  Boy did I feel privileged when these gorgeous treats appeared in my mailbox.


I tried to use the yarn as it was, perfectly measured and just alternating the two balls.  But, I ended up liking a more randomly ordered stripe, instead of a consistent stripe.  So that meant lots of cutting of my self-striping yarn and weaving in of those ends.  Grrr....  AND...I added white, you have to have the white in there to break up all that color.  BUT, I love LOVE my scarf!  It is a cushy cashmere blend and is extra wide for more smooshy goodness.


Pattern is coming!

Sunday, April 8, 2012

Heartstrings Haul

Yesterday I spent my requisite hour and a half at Heartstrings Yarn Studio in Chico, CA.  We are visiting the in-laws for Easter, and I snuck out to ogle the yarn-goodness over on the Esplanade.  Well, they knew precisely where I was, so I didn't really "sneak out."

I love this shop.  They have a HUGE selection of yarn, everything from pricey art yarns at $50 per skein to humble cotton/acrylic blends for $4 per skein.  And their sale corner is great!!!  Half price yarn, baskets full!  This is where I get in trouble.  This visit I had a gift certificate from my SIL, so I chose some cotton for a new project.  Then I went hunting in the sale baskets.  I justify these sale purchases because A:  hello?   half price!  and B: the yarn I bought is for projects for my kids.  THAT does not count as wanton yarn buying.

Here are the goodies!


Upper left yarn:  Malva by Filatura di Crosa.  It's a ribbon yarn and I plan to use it with some pink cottons I have at home, to make a dress for Miss E.
Book:  Custom Crocheted Sweaters by Dora Ohrenstein.  Great sweater patterns in here, plus detailed instructions on customizing and fit.
Upper right yarn:  Escape by Sirdar.  This will be a sweater (or yarn jacket as he calls it) for Mr. M.
Bottom left:  Ultra Pima Cotton by Cascade.  As you can see I've already started my new project...it's a top for ME!